For beginner saxophonists, having an accurate saxophone fingering chart is crucial. A saxophone fingering chart is a tool that shows which fingers to use for playing different saxophone notes.
The numerous keys on woodwind instruments, including the saxophone family, can be overwhelming for those looking to learn to play it. Whether you play an alto or tenor saxophone, a fingering chart can help you navigate those first notes.
This article will discuss how to read and play saxophone notes. We will also talk about fingering charts.
Sax Fingering Chart
Here’s a brief overview if you are new to using fingering charts or a beginner saxophone player.
There are various saxophone fingering charts available online. Several saxophone fingering charts may also be found in several saxophone method books.
Many saxophone fingerings are quite intuitive. Some, however, are not. The most intuitive fingering isn’t an excellent option in certain circumstances. A reliable reference is a good idea to ensure accuracy and avoid frustration.
The fingering chart is organized into blocks to help you quickly recognize the keys and determine which ones to use.
However, before using the chart, you must have a basic knowledge of how the saxophone works.
The Saxophone Mouthpiece

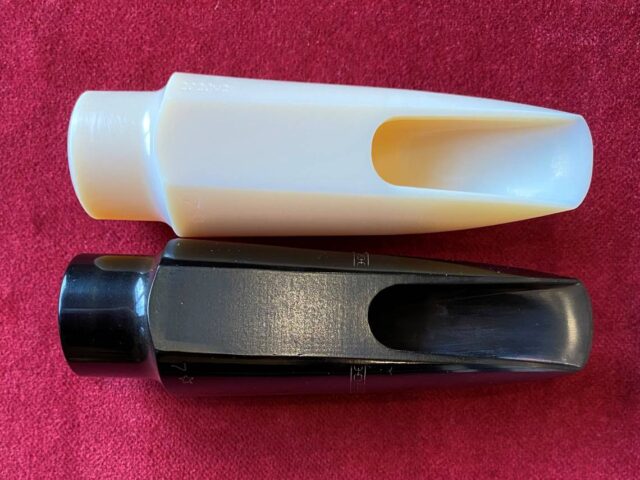
The mouthpiece is responsible for producing sound in a saxophone. It is placed at the very end of the instrument and has three components:
- The mouthpiece,
- reed, and
- ligature
Correctly assembling the mouthpiece is critical in producing a good sound.
Assembling the Mouthpiece
Here are the steps to correctly assemble your sax mouthpiece:
- Take the mouthpiece and turn it over so that the flat side is facing toward you.
- Moisten the thin end of the reed by placing it in your mouth.
- Attach the ligature to the mouthpiece.
- Insert the thick end of the reed underneath the ligature and onto the mouthpiece.
Avoid over-tightening the ligature, which could affect the music and sound quality. Just tighten it enough with your fingers to keep the reed in place and allow it to vibrate properly.
Putting the ligature on the mouthpiece before the reed is advisable, as it’s better for the reed.
Hand Positioning on Saxophone
Each unique shape on the fingering chart represents a saxophone key. If a shape is filled in, the corresponding key should be pushed down, while an empty shape signifies that the key should not be pressed.
To use the chart, locate the corresponding keys on your saxophone and press down the indicated finger for any filled-in shapes.
Left-Hand
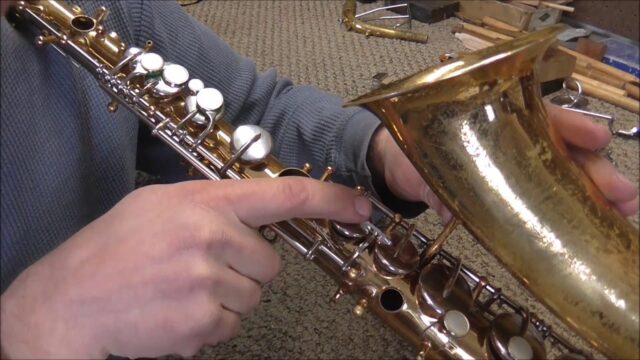
To begin, position your thumb on the button at your saxophone’s back. Then, place your left finger on the pearl keys starting from the top.
You may see a small key between the first and second keys, which is unnecessary for now.
For the first key, use your index finger, skip the small key, use your second finger for the second key, and your ring finger for the third key.
Right-Hand
Using your right hand is comparatively easier as there are only three pearl keys to consider. Place your index finger on the first pearl key, middle finger on the second, and ring finger on the third.
It is essential to note that when positioning your right hand, your left hand should already be in place. Visualize the saxophone as a long tube with holes that need to be covered to make the tube longer.
Placing your fingers in sequence covers the holes and increases the length of the tube, allowing the right-hand keys to function. Therefore, the left-hand keys should also be closed simultaneously.
The order in which fingers should be placed on the saxophone is as follows:
- Begin with the left-hand index finger,
- Followed by the second finger and third finger.
- Add the right hand’s first, second, and third fingers accordingly.
Alternate Fingering

To learn to play most saxophone notes, you only need to use one specific fingering. Usually, the charts list the fingerings in order of preference.
Usually, the fingerings are listed according to which is used more often in those cases. Sometimes there may be more than one fingering listed. When a second fingering is listed, it is usually for trills or fast chromatic passages.
As you gain more experience, you may discover additional alternate fingerings that work well for you. These fingerings may be minor modifications to the fingerings on the chart provided.
Simple Melody on Alto Saxophone For Beginners
After recognizing your left-hand and right-hand keys, you can now experiment and create melodies on your saxophone.
As a beginner, you may already know six notes, namely B, A, G, F, E, and D. Take the opportunity to play around with these notes and come up with your own tunes and melodies.
Final Thoughts

A saxophone fingering chart is helpful for beginners. As you practice and gain experience, you may discover alternative fingerings that work for you. Though new fingerings may be initially challenging, they can ultimately improve efficiency.


